Hey everyone, it’s John, welcome to my recipe page. Today, I’m gonna show you how to prepare a special dish, home-grown fresh green tea: how to process freshly picked green tea leaves in a microwave. One of my favorites. For mine, I will make it a little bit tasty. This will be really delicious.
No technology to process tea leaves? Here's a traditional method of processing green tea leaves. The tea pickers have to pick the fresh leaves from the apex.
Home-Grown Fresh Green Tea: How to Process Freshly Picked Green Tea Leaves In a Microwave is one of the most popular of current trending foods in the world. It’s appreciated by millions every day. It is easy, it is quick, it tastes yummy. Home-Grown Fresh Green Tea: How to Process Freshly Picked Green Tea Leaves In a Microwave is something that I have loved my entire life. They’re nice and they look fantastic.
To get started with this recipe, we have to first prepare a few components. You can cook home-grown fresh green tea: how to process freshly picked green tea leaves in a microwave using 1 ingredients and 11 steps. Here is how you cook that.
The ingredients needed to make Home-Grown Fresh Green Tea: How to Process Freshly Picked Green Tea Leaves In a Microwave:
- Make ready 1 Tea leaves (fresh)
Vitamins and iron in green tea may also help lower cholesterol and How to make tea: Warm a cup with hot water and discard the water. If using fresh lavender, put two or three flower heads and a few leaves in a tea. Green tea is the least processed among the six types of Chinese tea. It undergoes the least amount of oxidation.
Steps to make Home-Grown Fresh Green Tea: How to Process Freshly Picked Green Tea Leaves In a Microwave:
- Gather the new yellow-green leaves (3 leaf shoots).
- I gathered up one big sieve worth. This amount of leaves is processed in 3 batches.
- Start processing the leaves as soon as they are picked. It's best not to wash them, but it bothers me not to so I rinse them quickly in water.
- Drain the water off well. Put the leaves on a heatproof dish and microwave for about 2 minutes. This steams the leaves.
- The steamed leaves are hot. Taking care not to burn yourself, rub the leaves vigorously. It may be best to rub them on a cutting board… Squeeze out the moisture in the leaves as you rub them for 2 to 3 minutes.
- Put the leaves back in the microwave, and microwave for 1 minute this time. From this point on we'll be drying the leaves.
- Repeat Steps 5 and size - rub the leave, then dry them out - 5 to 6 times. The fragrance of the new tea leaves will fill the room.
- The leaves will gradually lose moisture and become crispy. When there's no moisture left in the leaves they're done.
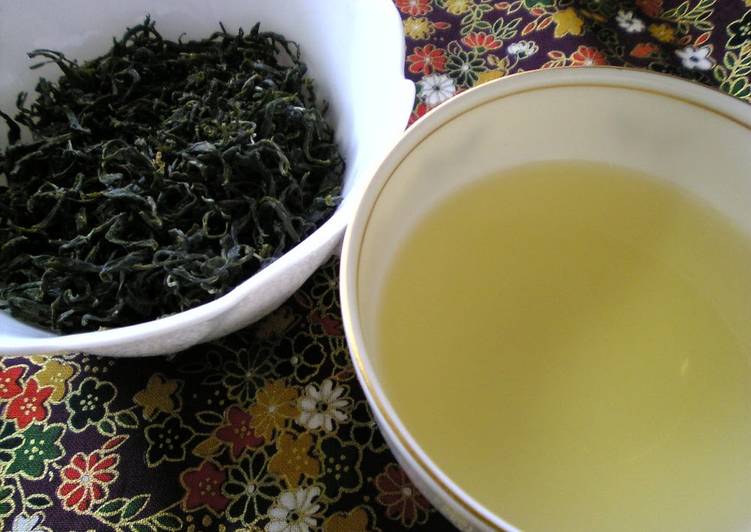
- These are the finished leaves! If some just won't dry out enough in the micorowave, dry them in a frying pan slowly over low heat.
- Let's try brewing some. The color was quite light this time, but the flavor was strong.
- Cold iced green tea is delicious too.
The shorter processing gives green I had requested to know whether the freshly picked leaves can be dried in a a microwave oven? If so how should the best heating would be for one kg. Making green tea the correct way is a straightforward process not too dissimilar from making black She's something of a tea expert so naturally I was quite nervous! Matcha is a specific kind of green tea which is grown and prepared slightly differently and then used in a. Green tea is a type of tea that is harvested and then quickly preserved.
So that is going to wrap it up with this special food home-grown fresh green tea: how to process freshly picked green tea leaves in a microwave recipe. Thank you very much for your time. I am sure you will make this at home. There’s gonna be interesting food in home recipes coming up. Remember to save this page in your browser, and share it to your family, friends and colleague. Thanks again for reading. Go on get cooking!